Timestamping documents
A timestamp serves as a digital proof of authenticity. Similarly to digital signatures, these server-generated timestamps are used to verify the authenticity of a document by recording the exact date and time an event occurred. Because of the server connection needed to establish the validity of a timestamp, it is substantially more secure than a regular digital signature and is frequently used by governments, financial institutions, and corporations worldwide.
Adding timestamps
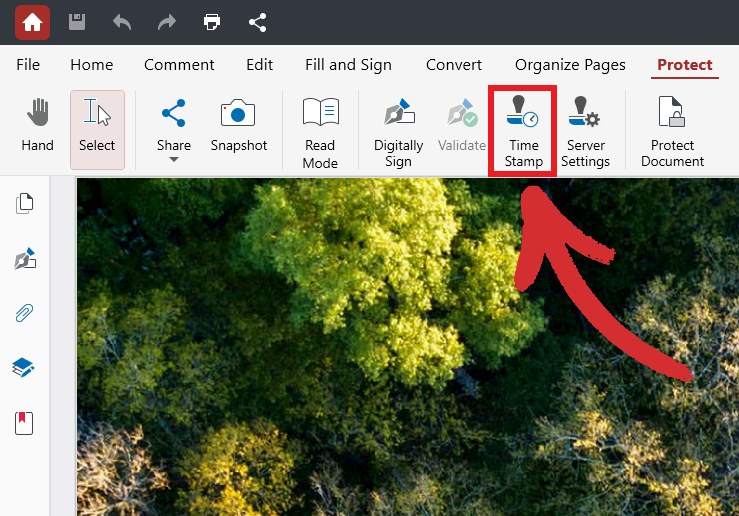
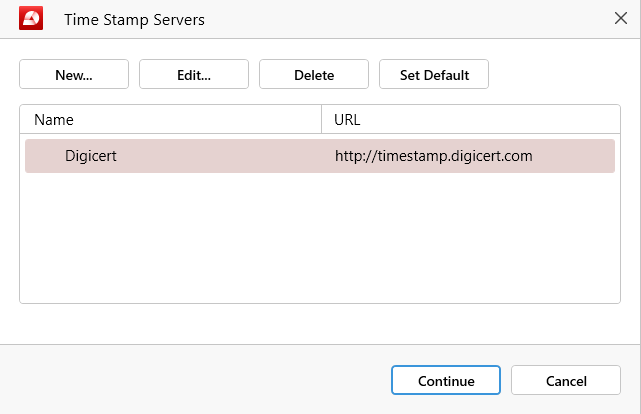
To add a timestamp, you need to connect to a server first. Here is how to add your first timestamp server connection from the “Server Settings” panel.
- Click on “Time Stamp”.
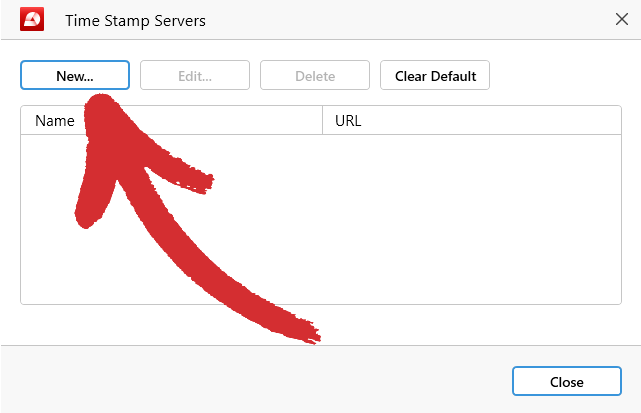
- Click on “New” to add a timestamp server.
- Provide the name and URL of the timestamp server you want to connect to.
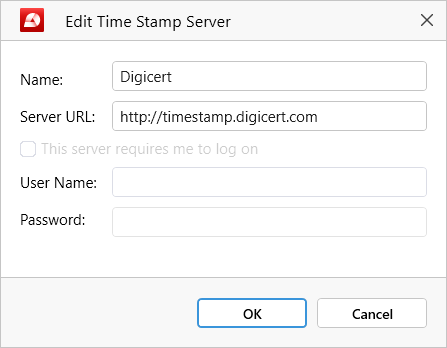
NOTE: Depending on how the timestamp server is set up, you may need to also provide a username and password before you can connect to it.
- With the server added, select it and click on “Continue”.
- Choose where to save a timestamped version of your original document.
- Your document has been timestamped!
TIP: If your timestamp is not validated automatically, you can verify it the same way as you would a digital signature.
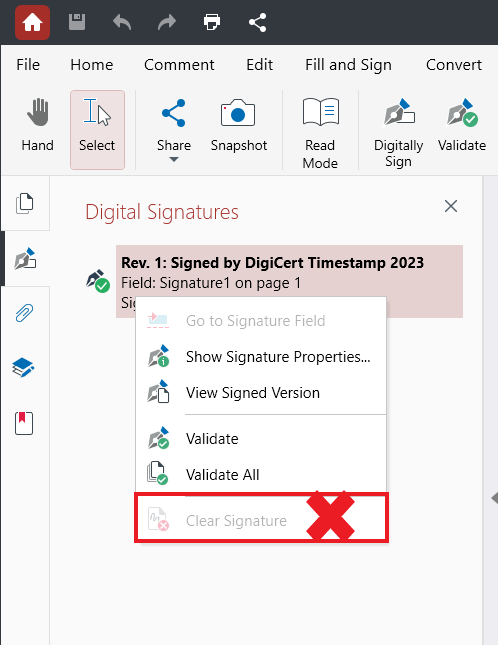
Please note that once added, a timestamp CANNOT be deleted!