Have you ever felt like you are spending more time scrolling through PDFs than actually reading them? Finding specific information within these often lengthy and complex documents can be difficult at first, but it’s not all that complicated if you follow our tips. In this article, we’ll look at some ways in which you can speed up your efficiency with PDFs, namely:
- How to search a PDF with built-in tools.
- How to make a PDF searchable with OCR.
- Bonus PDF search tip – read until the end!
How to search a PDF with built-in tools
Most PDF editing software comes equipped with a search PDF bar that can typically be accessed with the Ctrl+F keyboard shortcut on Windows and Cmd+F on Mac. A seemingly simple feature, the search bar offers surprising power as it allows you to instantly look up complete or partial words and phrases and will also highlight any found matches in the text.
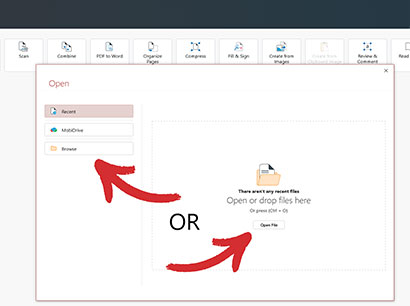
In case you’ve never used PDF software before, PDF Extra and its intuitive user interface have you covered. To search your PDF:
1. Launch the app.
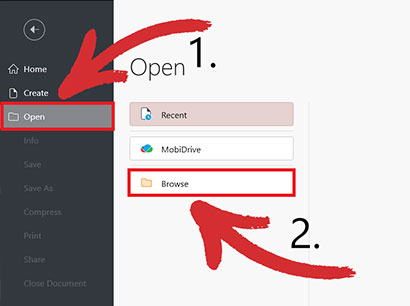
2. Open your preferred file.
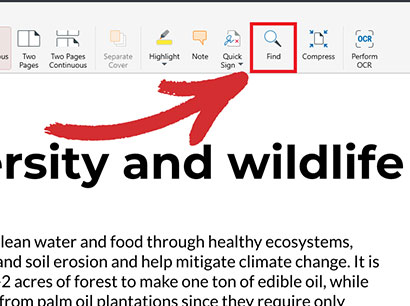
3. Click on the magnifying glass icon or press Ctrl+F.
4. Type in the word or phrase you want to find. Any found words or phrases will be highlighted in yellow.
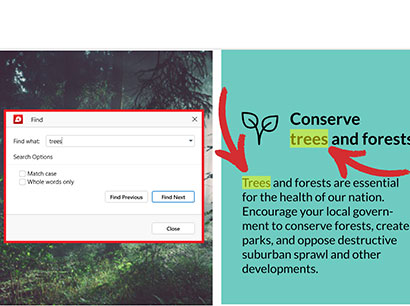
TIP: For partial searches (i.e. incomplete words), merely typing your text into the search bar is enough. If your word features a capital letter, write it capitalized and check the “Match case” option. If you’re looking for specific words or phrases, check the “Whole words only” option.
5. If no matches show up on your current page, click on “Find Previous” or “Find Next” to perform a PDF search on a wider level.
Note that the effectiveness of the PDF search engine is very much dependent on the quality of the document's text extraction and indexing. It also doesn’t work on scanned PDFs, which is where OCR – optical character recognition – comes into play.
How to make searchable PDFs with OCR
You’ve probably experienced this before – you download a form from the web only to find out that it’s a scanned image and can’t be searched or edited in any way. In cases like this, having a reliable OCR tool at your disposal can be invaluable. What is OCR and how to search a PDF with it, you ask?
Optical Character Recognition technology converts scanned text (pixels) into actual searchable content (characters). Simply put, OCR for PDFs is like turning hieroglyphics into plain English – the program scans the image of your document, recognizes individual letters, and then converts them into searchable text. This means that applying OCR to a scanned document will allow you to use the built-in PDF search tool as if it were a regular text-based PDF.
Many software applications and online tools offer OCR functionality. Among these is PDF Extra, which is outfitted with some of the best optical character recognition software on the market, giving you up to 98% accuracy in a single click.
To OCR your document:
1. Launch the app.
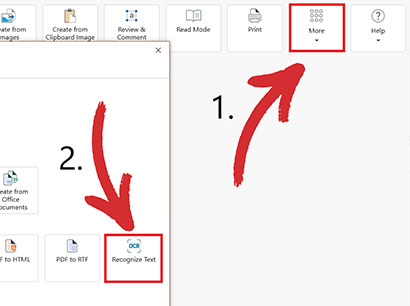
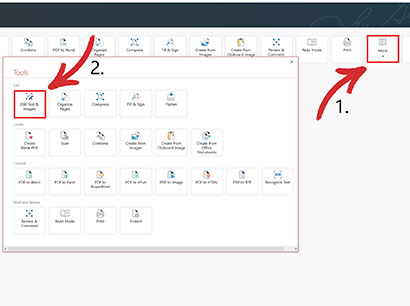
2. From the home menu, go to “Tools” → “Recognize Text”.
3. Open the document you want to OCR.
4. Choose the number of pages you want to OCR and how many languages are present in your document (up to three) to get the best results.

5. Click on “Apply” to confirm your selection.
6. Press Ctrl+F to word search a PDF.
BONUS: Find things faster with bookmarks
While word search PDF functions are essential for pinpointing specific terms, bookmarks offer a complementary approach to PDF navigation. Think of bookmarks as digital sticky notes you can place within the document, allowing you to jump to specific sections with ease. This is particularly helpful for lengthy PDFs with well-defined sections or chapters.
Here's where PDF Extra takes things a step further. While many PDF readers offer basic bookmarking functionality, PDF Extra features a multi-level bookmarking system that allows you to create sub-categories within your bookmarks. Below are a few pointers on how to use both bookmark types:
- Main-level bookmarks: Think of these as chapter headings. Create bookmarks for major sections (Introduction, Methodology, Conclusion, etc.).
- Sublevel bookmarks: For finer control, add sublevel bookmarks. These could be subsections within a chapter or something else.
To add bookmarks within PDF Extra:
1. Launch the app.
2. From the home menu, go to “Tools” → “Edit Text & Images”.
3. Open the document you want to place bookmarks in.
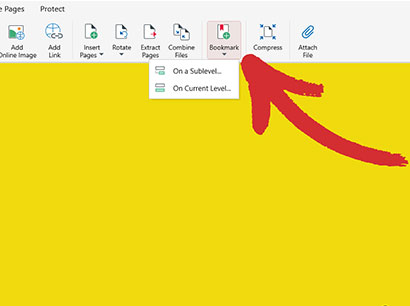
4. Click on “Bookmarks” and choose if you want to create one on a current level or a sublevel.
5. Quickly rearrange, rename, add, or remove as many bookmarks as you need.
6. Select any bookmark to jump to a specific section of your document.
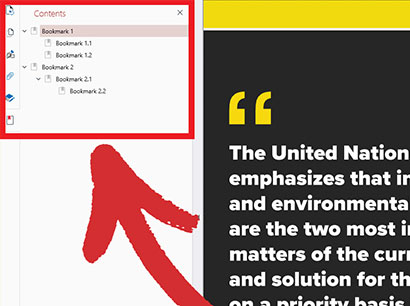
Once created, you can easily access your bookmarks from the “Contents” panel within PDF Extra which can be used as a handy alternative to the traditional search PDF methods. Simply click on a bookmark to jump to the corresponding section of the document.

Final thoughts
In summary, there are two reliable textbook PDF finder methods for finding what you need:
- Built-in search: quickly find words or phrases within individual files with Ctrl+F.
- Optical recognition: make scanned PDFs searchable by applying OCR.
Combine these methods with bookmarks and you’ve got yourself the perfect content-finding recipe that will save you lots of time and frustration and will improve your productivity levels overnight. Happy word hunting and until next time!